Yes, integrated lighting genuinely improves what your security cameras capture, but only when it’s chosen and aimed correctly. For most homes and small commercial sites, a floodlight camera or a dimmable wall light cam is the simplest option that works well straight out of the box. Get the placement, brightness and privacy basics right before you switch anything on.
TL;DR:
- Properly aiming and choosing the right color temperature of security lighting significantly enhances footage clarity and identification, more so than simply increasing brightness.
- Floodlight cameras are ideal for perimeter deterrence, while wall light cams suit entrances; standalone floodlights with cameras offer flexibility but need precise manual alignment.
- Infrared and covert lighting are discreet options for low-profile monitoring but produce monochrome footage that lacks color details essential for identifying individuals or vehicles.
- For locations with high risk or complex setups, professional assessments ensure optimal placement, compliance, and integration with smart home systems, improving overall security effectiveness.
- Regular maintenance, weather considerations, and careful planning around neighbors and foliage are critical to ensuring consistent, unobstructed, and legally compliant camera lighting performance.
Table of Contents
- What are the main types of security camera lighting?
- Does colour night vision actually beat infrared?
- Should a security camera go above or below the light?
- What power and connectivity setup works best?
- What are the legal requirements for security camera lighting in Australia?
- How do you choose the right lighting setup for your camera?
- When should you bring in a professional?
- How does light direction and colour temperature change what your camera sees?
- How energy efficient is security camera lighting?
- Can security camera lighting connect to a smart home system?
- How do you maintain security camera lighting over time?
- How do weather, foliage and reflections affect lighting performance?
- How should lighting differ across property types?
- What matters most in a lighting decision, and what’s overrated
- Get a professional lighting and camera assessment
- Sources
- FAQ
What are the main types of security camera lighting?
Four approaches dominate the market, and each suits a different property and priority.
Floodlight cameras combine a hardwired light and camera in one housing. They’re the go-to for driveways, side passages and anywhere you want wide, bright coverage that also scares off anyone loitering. Most units mount where an existing floodlight already sits, which cuts installation time considerably.
Wall light cams and integrated wall fixtures sit closer to entry points. Think porch lights, garage lights or carriage lamps with a camera built in. Many now offer dimmable output, so you get ambient lighting at low intensity and a brighter response when motion triggers it.
Separate floodlights paired with an independent camera give you more flexibility over positioning, since the light and the lens don’t have to live in the same box. The trade-off is coordination. You need to manually align the beam with the camera’s field of view and make sure both trigger together, otherwise you end up with a well lit driveway and a camera pointed at the fence.
IR and covert lighting suit situations where a bright light would be counterproductive: monitoring a shed, a loading dock at night, or any spot where you’d rather not announce the camera’s presence. Infrared illuminators light the scene in a wavelength invisible to the naked eye, giving you usable monochrome footage without a glowing beacon.
- Floodlight cameras: best all-round choice for perimeter deterrence and identification.
- Wall light cams: neat, low-profile option for entrances and porches.
- Separate floodlight plus camera: flexible but requires manual alignment.
- IR/covert lighting: discreet monitoring where visible light isn’t wanted.
Property managers running multiple buildings often mix these across a site. Front entries get wall light cams for a tidy look, perimeters get floodlight cameras, and service areas get IR.
Does colour night vision actually beat infrared?
For identifying a face or a number plate, yes, colour night vision usually wins, but it demands more from your lighting setup than IR does. Colour sensors need enough ambient or supplemental light to render true colour after dark, which is why colour night vision cameras are typically paired with a built-in floodlight or spotlight. Skimp on the light and you get a grainy, washed out image that’s technically colour but useless for identification.
Infrared sidesteps that problem entirely. An IR illuminator lights the scene invisibly, giving you a clean monochrome image with no glare and no complaint from the neighbours about a light shining into their yard. The catch is that monochrome footage strips out colour details like clothing or vehicle paint, which can matter if you’re trying to describe someone to police.
Wide Dynamic Range (WDR) processing sits underneath both approaches. It balances bright and dark areas in the same frame, which matters enormously once you add a strong light source into the mix. Get it wrong and you’ll blow out highlights near the lamp while the rest of the frame sits in shadow.
- Check footage quality at your actual identification distance, not just up close to the lens.
- Adjust exposure and beam angle together until faces or plates are legible at that distance.
- Compare how footage is stored, since local microSD cards and cloud storage affect how quickly you can retrieve evidence.
- Re-test after any seasonal change, since longer nights and different sun angles shift how the same lighting performs.
Bright lighting without correct aiming can actually destroy a camera’s evidence value rather than improve it, because a lens pointed toward a hard light source will flare and wash out everything else in frame.
Pro Tip: Walk out to your identification distance after dark with your phone’s camera. If you can’t make out details on your own phone screen, your security camera almost certainly can’t either.
Should a security camera go above or below the light?
The camera should sit close to the light but never staring directly into it. A lens looking straight into a floodlight will flare, blowing out the whole frame the moment the light triggers, which defeats the entire point of the setup. Most manufacturers mount the camera slightly below or beside the light housing, angled so the beam illuminates the subject area in front of the lens rather than crossing it.
Side lighting or lighting positioned slightly off axis from the camera generally produces cleaner footage than a light mounted directly above and pointed straight down the same line as the lens. Front-on lighting from an angle avoids the harsh shadow-and-glare combination you get from a straight overhead beam.
A few placement habits separate footage that holds up from footage that doesn’t:
- Aim the beam at the ground and mid distance zone where people actually walk, not at the horizon.
- Fit adjustable panels, visors or shields to narrow the spread and stop light spilling into the lens or over the fence line.
- If a light is mounted above a camera and causing glare, lower its intensity setting or add a hood rather than repositioning the whole unit.
- Use motion activation instead of constant illumination, since a light that’s only on when triggered draws less attention and fewer complaints.
Neighbours matter here more than most people expect. Lighting that spills across a boundary fence is one of the most common triggers for a nuisance complaint, and disputes over surveillance cameras between neighbours are becoming more common as smart lighting and camera kits get cheaper. Narrow beam angles, dimming schedules overnight, and motion triggers rather than dusk-to-dawn floods all reduce that friction.
Pro Tip: If a neighbour’s window sits within your camera’s field of view, angle the light and the lens away from it, even if that means slightly reduced coverage on your own boundary. It’s a smaller compromise than a formal complaint.
What power and connectivity setup works best?
Hardwired 240V floodlight cameras give you continuous lighting and continuous recording, and they’re the standard choice for anyone who wants the system running reliably every night without checking a battery level. Connecting to mains power requires a licensed electrician, both for safety and because most warranties require compliant installation.
Battery and solar powered units cut down on wiring, which makes them useful for a shed, boundary fence or rental property where running a cable isn’t practical. The trade off is that continuous recording drains batteries fast, so most battery units rely on motion triggered clips rather than 24/7 footage, and solar panels need to be angled correctly and kept free of dust to keep pace with usage.
- Hardwired: best for continuous recording and reliable nightly lighting, needs an electrician.
- Battery: easiest install, but limited to motion-triggered clips and needs regular charging or swaps.
- Solar: reduces running costs but performance drops in poor weather or shaded positions.
- Wi-Fi vs wired ethernet: Wi-Fi suits single consumer cameras, wired ethernet suits monitored or multi-camera business systems where dropped connections aren’t acceptable.
Storage choice should match your power setup. A continuously recording hardwired camera needs either a beefy local drive or a solid internet connection for cloud upload, since constant footage adds up quickly. If you’re weighing up a full install, the step-by-step guidance on home security camera installation covers what a licensed installer typically checks before connecting to mains power.
What are the legal requirements for security camera lighting in Australia?
Privacy and surveillance rules apply to the camera and its footage, not just the light, and they vary depending on where you live and who you are recording. Where the Privacy Act applies to your organisation, the Australian Privacy Principles require you to notify people they may be recorded, keep footage secure, limit who can access it, and set a defined retention period rather than keeping it indefinitely.
State and territory surveillance device laws add another layer, and they’re not uniform. Audio recording tends to carry stricter rules than video. In New South Wales, for example, optical devices and listening devices sit under separate legal tests, meaning your video footage could be entirely lawful while an audio track picked up by the same unit breaches listening device rules.
A handful of practical steps cover most of the compliance gap for a typical property:
- Put up visible signage at entry points so people know they’re entering a monitored area.
- Never point a camera at a neighbour’s private space, or your own bathroom, bedroom or similar private area.
- Write down a retention policy, even a simple one, stating how long footage is kept and who can view it.
- For workplaces or multi-tenant buildings, follow workplace surveillance notice requirements and give written notice to staff before installation.
If your property sits on a shared boundary or overlooks common areas, treat that as a compliance question up front rather than something to fix after a complaint lands, since a neighbour has scope to challenge an intrusive camera under nuisance law even where the surveillance laws themselves are technically satisfied.
How do you choose the right lighting setup for your camera?
Start with your primary goal, because it decides almost everything downstream. If deterrence and identifying a face or number plate is the priority, a floodlight camera with colour night vision is the stronger option. If discretion matters more, whether that’s watching a shed without lighting up the whole yard or monitoring a workplace without drawing attention, IR-based lighting is the better fit.
- Set an identification distance, the point at which you actually need to recognise a face or read a plate, then test candidate cameras and lights at that exact range after dark.
- Check for existing hardwired floodlight points on the property. Swapping a like-for-like fitting for a floodlight camera is often the fastest and cheapest path to a working system, provided a licensed electrician handles the mains connection.
- Decide on signage, retention periods and who gets footage access before the system goes live, not after.
- Walk the property boundary at night once installed to check for glare spilling onto neighbouring land or public footpaths.
| Priority | Recommended lighting | Key trade off |
|---|---|---|
| Deterrence and colour ID | Floodlight camera | Needs stronger light, more visible to neighbours |
| Discreet monitoring | IR illuminator | No colour detail, monochrome only |
| Entry point coverage | Dimmable wall light cam | Narrower field of view than a floodlight |
| Multi-site or business use | Hardwired with wired ethernet | Requires licensed electrician and cabling |
Property managers overseeing several buildings benefit from running this checklist per zone rather than treating the whole site as one decision, since a loading dock and a tenant entrance rarely share the same priority.
When should you bring in a professional?
Some setups are genuinely simple enough to handle yourself: a single wall light cam on a porch, or a battery unit on a shed. Complexity climbs fast once you’re dealing with multiple cameras, integrated alarm monitoring, or a site where the field of view has to satisfy both security and legal notice requirements. Some security providers have over 15 years of experience designing integrated systems aligned to standards including AS 4806, the Australian standard covering closed circuit television systems.
A professional installer maps coverage and beam angles during the day, then verifies image quality at night from the actual points someone would need to identify a person or vehicle. That’s a step most DIY installs skip entirely. The handover from a proper installation includes a documented layout, a signage plan, and a record of camera angles and retention settings you can refer back to later, which matters when a system needs troubleshooting or expanding down the track. For a broader look at aligning cameras and lighting to a documented standard, the guide to security systems with cameras covers what that process typically involves.
How does light direction and colour temperature change what your camera sees?
The angle light hits a scene from changes what the camera can actually resolve, sometimes more than the amount of light itself. A beam coming from directly behind the camera flattens shadows and can wash out fine detail like facial features. Light coming from the side reveals more texture and depth, which is why professional installers favour angled or off axis lighting over a light mounted in perfect alignment with the lens.
Colour temperature, measured in kelvin, affects how natural skin tones and clothing colours render on camera. Warmer light, in the 2700 to 3000 kelvin range, tends to look cosy to the eye but can shift colours toward orange or yellow on camera, making it harder to accurately describe someone’s clothing from footage. Cooler light, closer to 5000 to 6000 kelvin, renders colours closer to how they appear in daylight and is generally the better choice where colour accuracy for identification matters.
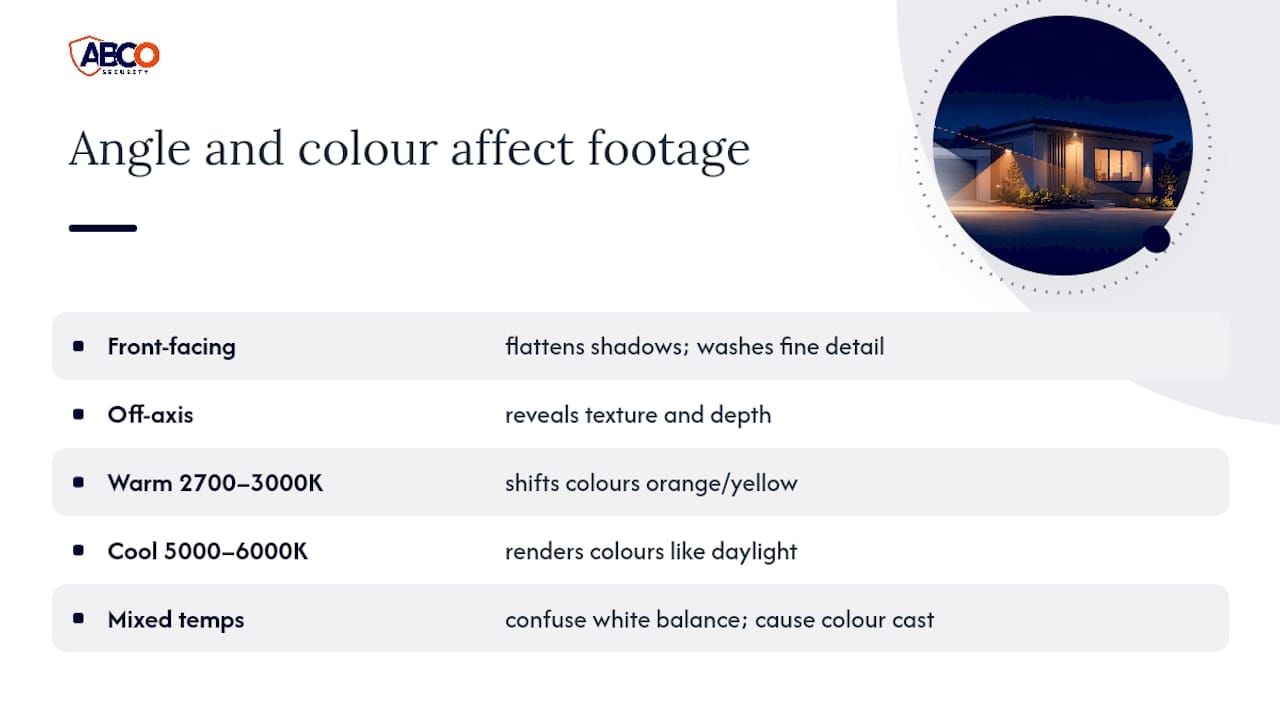
Mixing colour temperatures across a property causes its own headache. If your floodlight camera runs cool white and a nearby porch light runs warm, the two light pools clash in a single frame and confuse the camera’s white balance, sometimes producing a colour cast that isn’t accurate to either light source. Where possible, keep colour temperature consistent across fixtures that share a camera’s field of view, and check the footage rather than relying on the spec sheet alone, since real world results vary between fixtures even at the same rated kelvin value.
How energy efficient is security camera lighting?
LED fixtures now dominate the security lighting market, and for good reason: they draw a fraction of the power an old halogen floodlight used while producing comparable or brighter output. Most modern floodlight cameras use LED arrays rated in the 1,200 to 2,600 lumen range, which covers a typical driveway or side yard without the running cost of older halogen units.
Motion activation is the single biggest efficiency lever available. A light that only fires at full brightness when it detects movement, then dims or switches off after a set period, uses a fraction of the energy a dusk-to-dawn floodlight burns through every night. Many units also support scheduling, so you can set lower ambient brightness during quiet hours and reserve full output for when it’s actually needed.
Solar powered units take efficiency further by removing grid draw entirely, though performance depends on panel positioning and weather. A solar floodlight camera facing a shaded wall or a run of overcast winter days will underperform compared to the same unit mounted in full sun, so solar suits secondary areas better than a primary entry point where reliability really matters.
For property managers running multiple sites, energy costs add up across a portfolio in a way they never do for a single household fixture. Motion-triggered LED floodlight cameras on timers, rather than constant dusk-to-dawn lighting, typically deliver the best balance between coverage and running cost across a multi-building property.
Can security camera lighting connect to a smart home system?
Most current floodlight cameras and wall light cams integrate with smart home hubs, letting you control brightness, schedules and motion sensitivity from a phone app rather than a physical switch. That matters practically: you can dim a porch light for guests, boost it to full brightness when you’re away, or set different schedules for weekdays versus weekends without touching the fixture itself.
Integration goes further than convenience. Linking lighting to a broader smart home or monitored alarm system means a triggered sensor elsewhere on the property, a door contact or a motion detector, can switch on relevant lighting automatically, rather than waiting for the camera’s own motion detection to catch up. Industry practitioners increasingly frame this as the shift from reactive recording, where the camera simply captures what already happened, toward proactive deterrence, where lighting and alerts respond the instant something triggers a sensor.
The practical limitation is compatibility. Not every camera brand talks to every smart home ecosystem, and mixing hardware from different manufacturers sometimes means running two separate apps rather than one unified dashboard. Before buying, check whether a unit supports the specific smart home platform already running in the property, since retrofitting compatibility after installation is far more disruptive than checking beforehand.
How do you maintain security camera lighting over time?
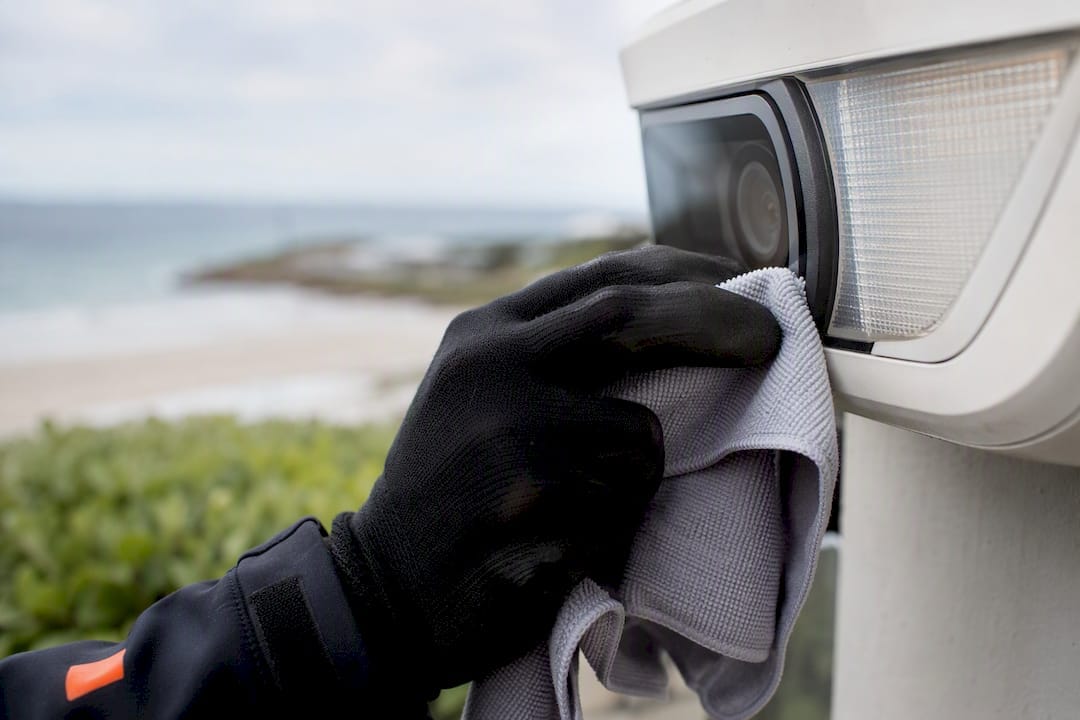
LED fixtures last considerably longer than the halogen and incandescent lights they replaced, with many rated for tens of thousands of hours of operation, but “rated” doesn’t mean “maintenance free.” Dust, cobwebs and insect buildup on a lens or light cover degrade image quality gradually, often so slowly that property owners don’t notice until footage is already unusable.
A basic maintenance routine catches most problems before they matter. Wipe down light covers and camera lenses every few months, more often in dusty or coastal environments where salt air accelerates grime buildup. Check motion sensor responsiveness periodically, since sensors can drift out of calibration or become blocked by growing foliage. Battery powered units need scheduled charging or cell replacement, and solar panels need occasional cleaning to maintain charging efficiency.
Weatherproofing rated to IP65 or higher is standard on outdoor units, but seals degrade over years of sun and rain exposure. A unit that’s been mounted outdoors for several years is worth a physical inspection for cracked housings or water ingress, particularly after a severe storm season. Replacing a failed light before it fails completely is cheaper and less disruptive than discovering it’s out during an actual incident, when the footage you needed simply isn’t there.
How do weather, foliage and reflections affect lighting performance?
Rain and fog scatter light in ways that dramatically reduce a camera’s effective range, since water droplets in the air bounce light back toward the lens rather than letting it reach the subject. A floodlight that illuminates 15 metres clearly on a dry night might only manage half that in heavy rain, which matters if your identification distance calculations were done on a clear evening.
Foliage causes two separate problems. Growing branches or shrubs can physically block a light’s beam or a camera’s field of view over time, shrinking coverage without anyone adjusting a setting. Foliage moving in wind also triggers motion sensors constantly, filling storage with false alerts and clips of nothing more than a swaying branch. Trim back growth near cameras and lights seasonally rather than once and forgetting about it.
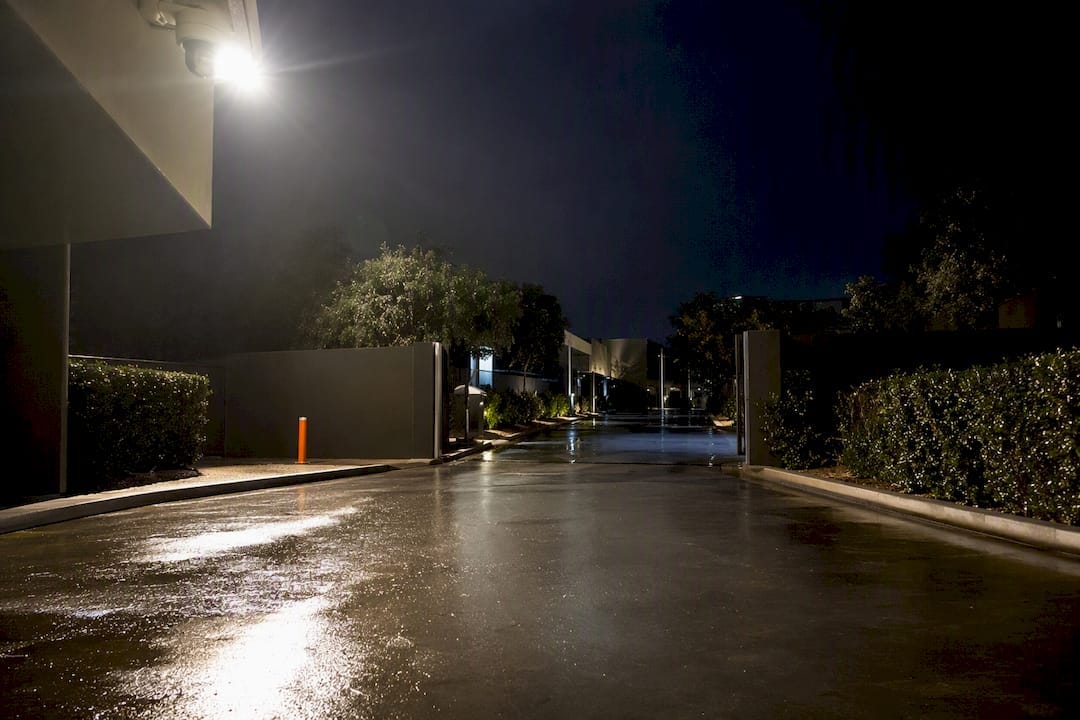
Reflective surfaces, wet pavement, glass windows, light coloured walls, can bounce light back into a lens and create glare or false bright spots that confuse exposure settings. A driveway that looks fine in daytime testing can produce a completely washed out frame on a rainy night once the wet surface starts reflecting the floodlight straight back at the camera. Testing footage across different weather conditions, not just on a dry clear night, catches these issues before they become a problem during an actual incident.
How should lighting differ across property types?
A suburban home, a townhouse complex and a construction site all need fundamentally different lighting strategies, even though the underlying technology is the same. Treating them identically usually means over-lighting one and under-lighting another.
For a standalone house, a floodlight camera at the driveway or garage combined with a dimmable wall light cam at the front door usually covers the highest risk points without excessive light spill onto neighbouring properties. Motion activation with a modest ambient glow overnight balances visibility with neighbour relations.
Multi-unit residential buildings and townhouse complexes need more coordination, since one resident’s lighting choice affects shared common areas and other tenants’ windows. Common entry points and car parks benefit from hardwired, wired ethernet connected systems that a body corporate or property manager can monitor centrally, rather than a patchwork of individually owned battery units.
Construction sites and industrial properties typically need the widest coverage and the toughest hardware, since these sites often sit unattended overnight and face a higher theft risk. Hardwired floodlight cameras with wide beam angles, paired with monitored alarm response, suit these sites better than consumer grade battery units designed for a suburban porch. The risk assessment checklist for lighting and blind spots is a useful starting point for property managers weighing up coverage priorities across a larger or higher risk site. Where a site includes gated vehicle access, coordinating entrance lighting with gate automation and entrance security systems avoids leaving a lit camera pointed at a gate that opens outside the light’s beam.
What matters most in a lighting decision, and what’s overrated
The conventional advice on security lighting spends too much time on lumen counts and not nearly enough on aiming. A brighter light pointed at the wrong angle produces worse footage than a modest light pointed correctly, yet most buying guides lead with brightness specs because they’re easy to compare on a product page. Aiming, beam shaping and colour temperature consistency do more for actual image quality than another few hundred lumens ever will.
The second gap is compliance sequencing. Most homeowners install first and think about signage, retention and neighbour impact later, if at all. That’s backwards. Deciding who can access footage, how long it’s kept, and where signage goes should happen before a camera goes live, not after a complaint or a data request forces the issue.
If there’s one thing to prioritise above all else, it’s testing at your actual identification distance in real conditions, rain included, before assuming a setup works. Specs on a box tell you what’s theoretically possible. A test at 15 metres on a wet Tuesday night tells you what you’ll actually get when it matters.
— Abco
Get a professional lighting and camera assessment
Choosing between a floodlight camera, a wall light cam, or a fully integrated monitored system gets harder once you’re weighing beam angles, mains wiring and compliance obligations at the same time. Some security providers offer site assessments that map coverage and lighting needs against AS 4806-aware installation standards, coordinate licensed electricians for mains connections, and support installations with around-the-clock monitoring where a property needs it.

Rather than guessing at lumen counts or discovering glare problems after installation, a documented assessment tells you exactly where lights and cameras should sit, what power option suits the site, and what signage and retention policy you need before switching the system on. If you’re managing a single property or a multi-site portfolio, request a camera monitoring consultation to get a plan built around your actual risk profile rather than a generic checklist.
Sources
- Security cameras | OAIC
- CCTV technical guidance (Queensland)
- New South Wales recording laws — security cameras
- Neighbours using surveillance cameras law report | ABC News
FAQ
What is the best type of lighting for security cameras?
For most properties, a floodlight camera with colour night vision and adjustable brightness panels gives the best mix of deterrence and identification quality. Discreet monitoring situations are usually better served by infrared lighting instead.
What kind of lights can block security cameras?
Any strong light source aimed directly into a camera lens, including a neighbour’s floodlight, a car’s headlights, or even the camera’s own poorly aimed light, can cause glare that washes out the image. Correct aiming, shields and adjustable beam angles reduce this substantially.
Should a security camera go above or below a light?
The camera typically sits close to the light but angled so the beam illuminates the scene in front of the lens rather than crossing directly into it. A camera staring straight into its own light source will flare and lose detail the moment that light activates.
Do security camera light bulbs really work?
Standalone security light bulbs with basic motion sensors do improve visibility and deter casual intruders, but they lack the recording, WDR processing and remote monitoring features built into a proper floodlight camera. For genuine surveillance value, an integrated floodlight camera or monitored system outperforms a simple sensor bulb.
Do I need council or legal approval to install security camera lighting?
Approval requirements vary by council and property type, but privacy and surveillance obligations apply regardless. Follow the Australian Privacy Principles where they apply to you, check your state’s surveillance device laws, and avoid pointing cameras at neighbouring private spaces.
Recommended
about
avada factory
Sempery ultricies nibh at dolor cras urna eleifend nec. Atiam efficitur tempor.